Summary:
You’ve done the research. You’ve watched the videos. You’ve read the forum threads. And somehow, the advice still doesn’t quite line up — one source says start with the protein skimmer, another says get the sump running first, and a third insists nothing matters until the cycle is done.
If you’re planning a saltwater or reef aquarium in Nassau County and you’re starting to feel like there’s no clean answer, you’re not imagining it. Most of the content out there was written for freshwater tanks. Reef systems are a different animal entirely — and the order in which you set up your filtration is one of the most consequential decisions you’ll make.
Aquarium Filter Installation: What the Sequence Actually Controls
Filter media order isn’t a preference. It’s dictated by biology. The sequence in which water passes through your filtration system determines whether beneficial bacteria can colonize properly, whether organic waste gets removed before it breaks down into something toxic, and whether your tank can complete the nitrogen cycle at all.
In a reef system, that cycle — the biological conversion of ammonia to nitrite to nitrate by beneficial bacteria — is the foundation everything else is built on. Get the filter sequence wrong, and you’re not just running an inefficient system. You may be actively preventing that cycle from establishing, which means the tank will never be safe for fish or coral, no matter how long you wait.
Aquarium Filtration Setup: Mechanical, Biological, and Chemical in the Right Order
The standard sequence for aquarium filtration setup is mechanical filtration first, then biological, then chemical — though in reef systems, chemical filtration (like activated carbon or GFO for phosphate control) is often run in parallel rather than strictly downstream. Each stage has a reason for its position, and moving them around creates problems that aren’t always obvious until weeks later.
Mechanical filtration — filter socks, filter pads, or sponge pre-filters — goes first because its job is to physically capture particulate waste before that debris reaches the biological stage. If debris reaches your biological media before it’s been filtered out, it clogs the porous surfaces where beneficial bacteria live and reduces the oxygen-rich flow those bacteria need to survive. You end up with a biological stage that’s slowly suffocating under a layer of waste it was never meant to handle.
Biological filtration comes next because it needs clean, oxygenated water flowing through it consistently. In reef systems, live rock is the primary biological filtration medium — the porous structure of the rock provides enormous surface area for bacteria to colonize. Ceramic bio media in a sump chamber can supplement this, but the principle is the same: bacteria need steady flow, oxygen, and a stable environment.
One of the most damaging mistakes we see in DIY setups is rinsing live rock or bio media in tap water to “clean” it. Tap water contains chlorine, and chlorine kills beneficial bacteria on contact. A single rinse can wipe out a colony that took weeks to establish.
Chemical filtration — activated carbon to remove dissolved organics, GFO to control phosphate — is typically run after the biological stage or in a dedicated reactor. Activated carbon is generally run continuously in reef tanks. GFO is used more selectively, since pulling phosphate too aggressively can stress coral. The key point is that chemical media should never be placed before biological media in the flow path. If it is, it strips out the organic compounds that bacteria need during the initial colonization phase, which can stall or prevent the nitrogen cycle from completing.
Why Reef Tank Filtration Differs From Freshwater — and Why Generic Guides Lead You Astray
The overwhelming majority of “how to set up a fish tank filter” content online is written for freshwater systems. That’s not a criticism — freshwater tanks represent the larger share of the hobby, and the content reflects that. But if you’re building a reef tank and following a freshwater guide, you’re working from the wrong blueprint.
Freshwater filtration is relatively forgiving. The biological load is lower, the chemistry is simpler, and the livestock is hardier. A hang-on-back filter with a sponge and some bio media will get the job done for most freshwater setups. Reef tanks operate under a completely different set of demands. You’re managing salinity, alkalinity, calcium, magnesium, and pH in addition to the nitrogen cycle. Your livestock — coral especially — is sensitive to parameter swings that freshwater fish would barely notice.
Protein skimmers are a good example of where the two worlds diverge. In a reef system, a protein skimmer is not optional — it’s one of the first pieces of equipment that should be running. Its job is to remove dissolved organic compounds from the water column before those compounds break down into ammonia, which reduces the biological load on your filtration system and keeps water quality stable. Most freshwater guides don’t mention protein skimmers at all, because freshwater tanks don’t use them.
If you’re following a freshwater setup sequence for a reef build, you may not have a skimmer in your plan at all, or you may not know when to introduce it relative to the rest of your equipment.
RO/DI water is another critical difference. Reef systems require water that has been processed through reverse osmosis and deionization to remove chlorine, chloramines, phosphates, and silicates. Tap water — even if dechlorinated overnight — contains enough residual compounds to fuel nuisance algae and stress sensitive coral. This isn’t a detail buried in advanced reef-keeping forums. It’s a foundational requirement that generic aquarium setup guides routinely skip because it doesn’t apply to freshwater tanks.
Nassau County tap water, like most municipal water on Long Island, contains compounds that will cause real problems in a reef system if not addressed before the water ever enters the tank. We’ve seen this firsthand with clients who started with tap water and had to tear down and restart their systems months later.
Aquarium Installation in Nassau County: What Changes When It's Your Home
Online guides treat aquarium installation as a purely technical exercise — equipment, media, sequence, cycle. What they don’t account for is the physical reality of the space where the tank is going. Nassau County’s housing stock is largely mid-century single-family homes, many built in the 1950s and 1960s. They’re solid homes, but they weren’t engineered with large aquarium installations in mind.
A filled 20-gallon tank weighs roughly 225 pounds. Scale that up to a 100- or 200-gallon reef system and you’re looking at well over 1,000 pounds in a concentrated footprint. Floor load capacity is a real consideration, and it’s one that a YouTube tutorial will never address. A professional installation starts with that assessment — before any equipment is ordered, before any plumbing is run.

What Does a Professional Aquarium Installation Actually Include?
A professional aquarium installation is not just someone showing up with a tank and filling it with water. The process starts well before any equipment is delivered — and it should, because the decisions made at the design stage determine how well the filtration system performs for the life of the tank.
At Island Fish & Reef, every installation begins with a consultation where we work through tank size, filtration type, livestock goals, space constraints, and cabinetry. We assign a dedicated project manager to each client who stays with the project from that first conversation through installation, cycling, stocking, and into ongoing maintenance. There are no handoffs. The person who understands your system is the person managing it.
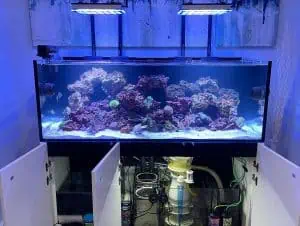
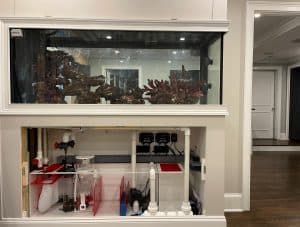
On the installation side, we assess the space structurally before anything else — floor load capacity, plumbing access, electrical requirements. For saltwater and reef systems, we handle the full filtration build: sump design and plumbing, protein skimmer placement and sizing, return pump configuration, RO/DI water preparation, live rock placement and aquascaping, and the initial cycle monitoring that determines when the tank is actually ready for livestock.
That last part matters more than most people expect. The nitrogen cycle takes four to six weeks to establish in a new tank. Adding fish or coral before it’s complete — even if the water looks clear — is one of the most common and most expensive mistakes in the hobby.
We also maintain an on-site quarantine and holding facility at our Bohemia location where fish and coral are observed and acclimated before they enter any client’s tank. It’s a step that most local services skip because it requires real infrastructure. For reef clients investing in high-value coral, it’s the difference between livestock that arrives healthy and livestock that introduces disease into a system that took months to build.
Common Questions Nassau County Homeowners Ask Before Installing a Reef or Saltwater Tank
One question we hear often is whether a home built in the 1950s or 1960s can support a large reef tank. The honest answer is: it depends on the specific location in the home, the floor joist span, and the tank footprint. A 200-gallon tank placed along a load-bearing wall on a concrete slab is a very different situation than the same tank positioned in the middle of a second-floor room with a long joist span. We evaluate this as part of every installation — it’s not something to guess at after the tank is already filled.
Another common question is whether saltwater tanks are harder to maintain than freshwater. They require more attention to water chemistry, yes — but the answer isn’t as simple as “harder.” Larger saltwater systems are often more stable than smaller ones because the greater water volume buffers against parameter swings. A 200-gallon reef is more forgiving of a missed water change than a 20-gallon nano reef. What matters more than tank size is whether the filtration system was set up correctly from the beginning. A well-designed reef system with properly sequenced filtration and a completed nitrogen cycle is genuinely manageable on a weekly maintenance schedule. A poorly set up system of any size is a constant problem.
People also ask whether they need a sump or whether a hang-on-back filter is sufficient for saltwater. For most reef systems, a sump is the better choice — it provides space for equipment like protein skimmers and reactors, increases total water volume, and keeps the display tank cleaner. Hang-on-back filters can work for smaller fish-only saltwater systems, but they’re not well-suited to reef tanks with significant biological loads and sensitive coral.
We’ve been serving Nassau County — from Long Beach and Atlantic Beach along the South Shore to Great Neck and Garden City — since 2003. The coastal communities here have a natural connection to marine environments, and reef tanks are a popular choice. We understand what that market looks like and what those installations require.
Getting Aquarium Installation Right the First Time
The filtration sequence isn’t the most exciting part of building a reef tank. But it’s the part that determines whether everything else works. Get it right and the system stabilizes, the cycle completes, and the livestock thrives. Get it wrong and you’re troubleshooting water chemistry for months, trying to figure out why a tank that looked fine on day one keeps crashing.
The information exists to do this well. The challenge is that most of it was written for freshwater tanks, and the pieces that apply to reef systems are scattered across forums, manufacturer guides, and YouTube channels that don’t always agree with each other. Having someone walk through the process with you — someone who has been doing this in Nassau County since 2003 — makes a real difference.
If you’re planning a saltwater or reef installation and want to talk through what the process looks like for your specific space and goals, Island Fish & Reef is a good place to start that conversation.
]